Get your probiotics in with these delicious, easy fermented carrots. The classic carrot flavor and crunch you love, plus a little bit of sour tang that fermentation brings. The process couldn’t be any easier, and the results are a gut healthy, probiotic rich superfood.
This post contains affiliate links, which means I make a small commission at no extra cost to you. See my full affiliate link disclosure here.
It’s rare to not have something fermenting on the farmhouse counter these days, whether that is my no knead sourdough bread, veggies, or kefir. (Learn how to make milk kefir or make water kefir at home, too).
If you thought vegetable fermentation was only for kimchi and sauerkraut, think again! There are so many vegetables that can be fermented. Carrots are one of our favorites.
Why You’ll Love This Recipe
It’s the perfect make-ahead side dish or delicious snack – Fermented vegetables are the perfect addition to any simple meal. All the prep work is done ahead of time, so when the meal is ready they can go straight from the fridge to the table.
An easy-to-follow recipe – Although you may think the fermentation process is cumbersome, it is actually a very simple equation of salt + liquid + time = crunchy, delicious, probiotic-rich superfood.
Great way to get in probiotics – Supplements are not the only way to get in probiotics. Like my homemade yogurt in the instant pot, these fermented carrots provide beneficial bacteria for gut health and are a great addition to your daily diet.
Ingredients for Fermented Carrots
Whole Raw Carrots – You can use carrots from the grocery store, farmers market, or you own garden. I usually opt for organic if buying from the store.
Sea Salt – Salt prevents the growth of harmful bacteria. When ferments are submerged in a salty brine, the good bacteria present on the fresh vegetables, namely Lactobacillus, can proliferate and grow uninhibited by bad bacteria. It also keeps the veggies crisp and adds flavor. My favorite is Redmond Sea Salt.
Filtered water – I prefer to use filtered water for my fermented food rather than tap water.
Tools You May Need
Fermentation lids – While you can use a tea towel and rubber band, these lids are great if you plan to do a lot of fermenting.
Fermentation weights – You can get creative here. I know some people who use a rock in a Ziplock bag. If you ferment often though, I love these glass fermentation weights.
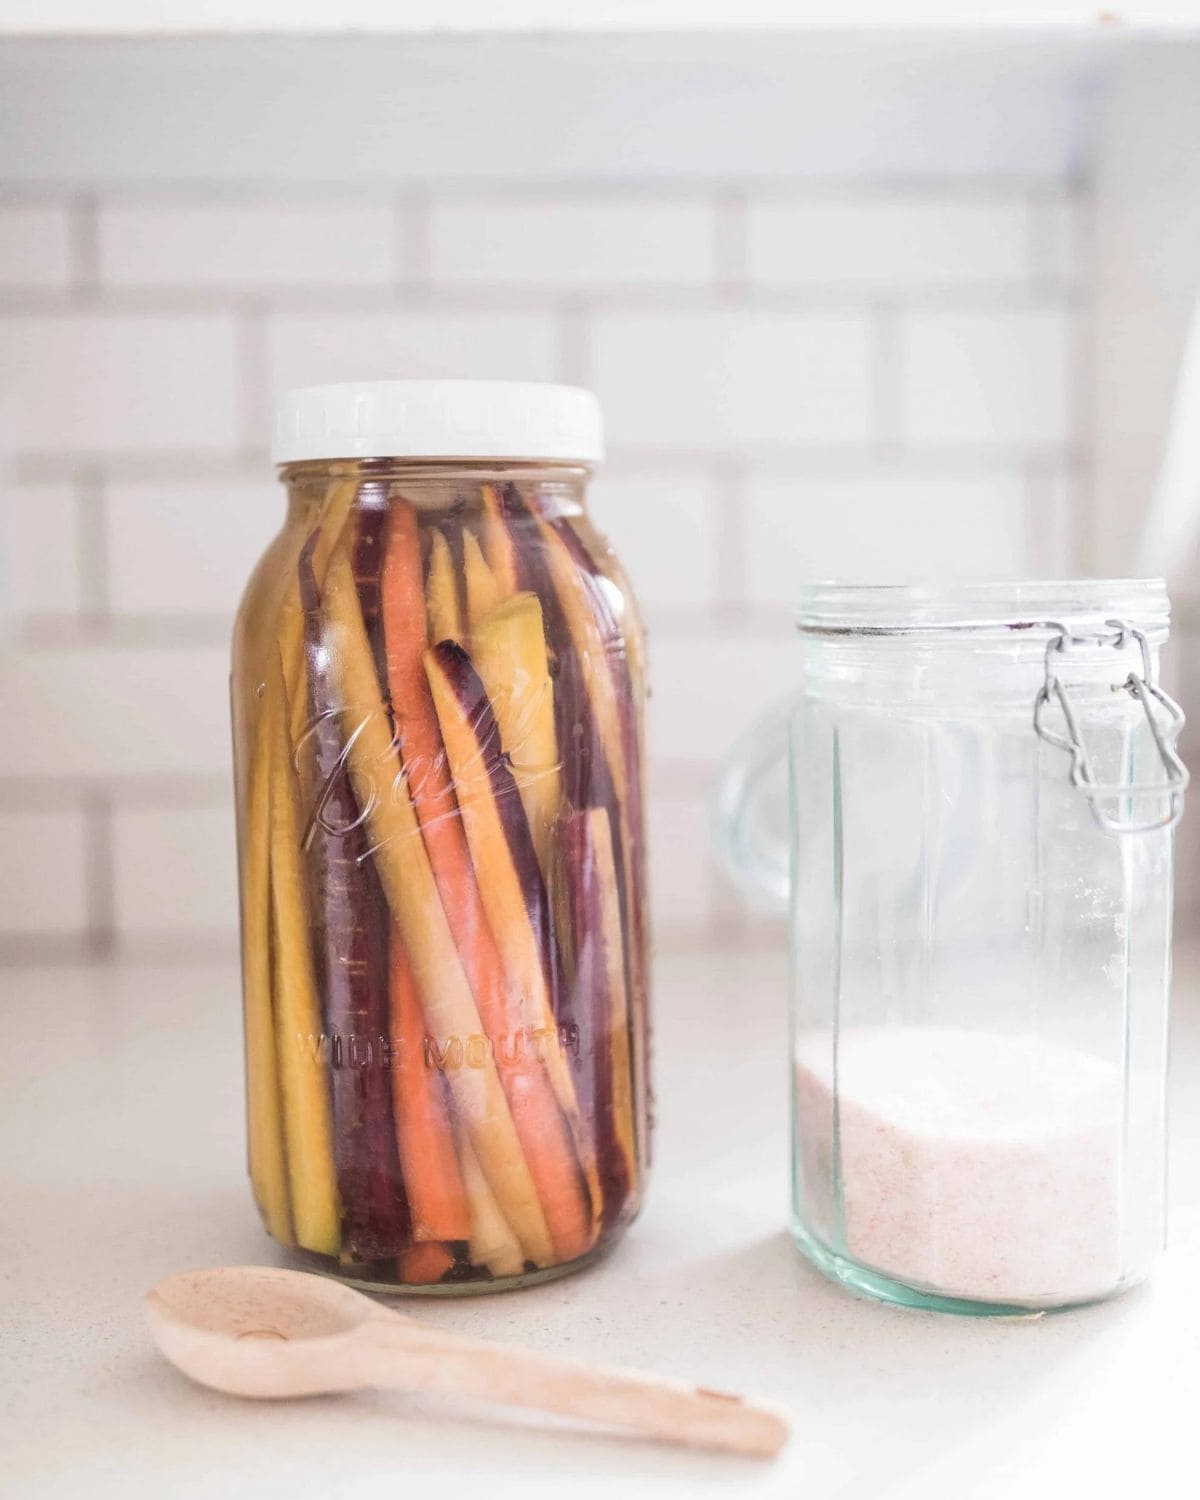
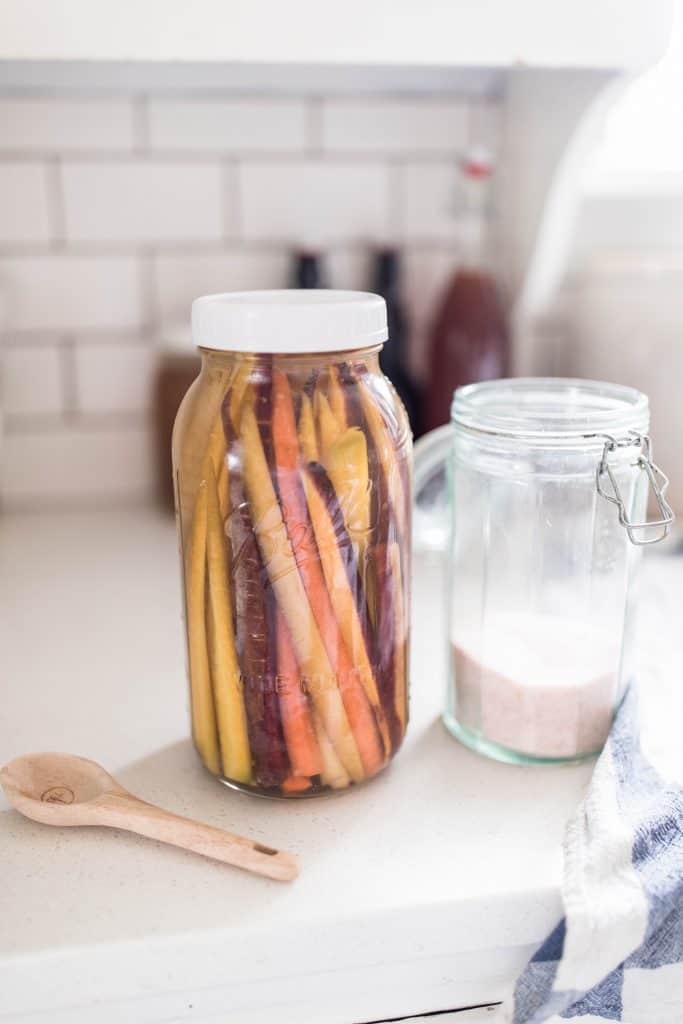
Jars – you can use any size of wide mouth jar. Since we have a big family and go through a lot of ferments, I usually use 1/2 gallon mason jars.
How to Make Fermented Carrots

Step 1: Bring 2 cups of water to a light simmer on stove. Remove from the heat and stir in the salt, until dissolved.

Step 2: Add the salt water to a half gallon glass mason jar. Fill the jar the rest of the way with filtered water.

Step 3: Slice the carrots into long thin sticks. Put them in another half gallon mason jar.
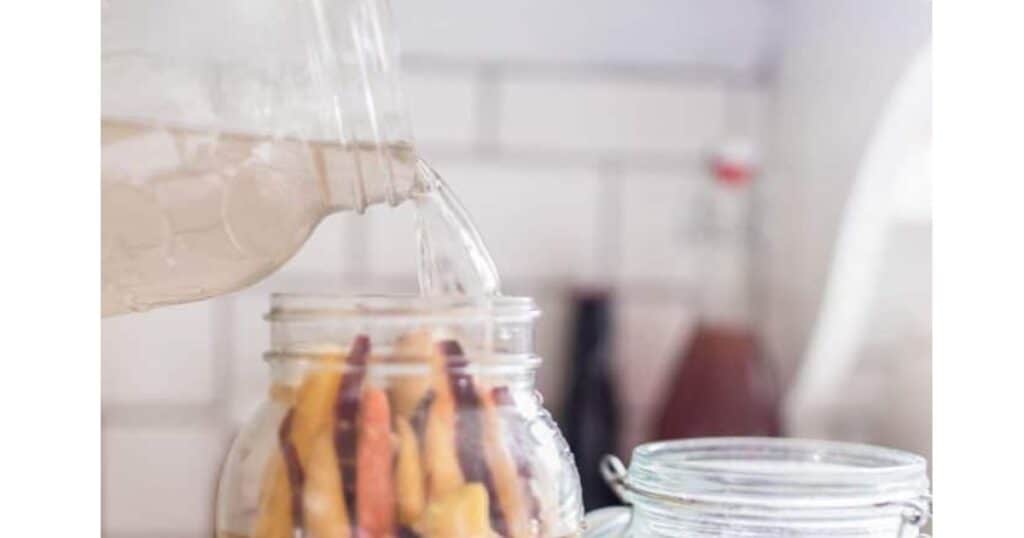
Step 4: Pour the prepared saltwater brine over them until they are fully submerged. Leave one to two inches headspace at the top of the jar.

Step 5: Add some kind of fermenting weight to keep the carrots underneath the liquid. This could be glass fermenting weights or even a folded up cabbage leaf or a rock in a ziplock bag.
Cover with a fermenting lid, a loose lid, or a tea towel and rubber band.
Step 6: Allow the carrot sticks to sit in an undisturbed place for 2-10 days. The amount of time will depend on the temperature in the house and your preferences. You can give the veggies a little taste each day to see if the desired taste and texture is reached. Once the carrots are done fermenting, cover them with a tight lid and move the jar to the refrigerator.
Tips For Making Fermented Carrots:
- Slice carrots into long strips to make them easy to remove from the jar.
- Make a big batch at one time and then you can enjoy them for months. They make such a great snack or side.
- Add your favorite flavorings to spice them up. We love to add cloves of garlic, fresh dill, mustard seed, and some peppercorns to give them a classic pickle taste.
- The carrots need to be submerged in the salt water brine to prevent mold or spoilage; I love using the glass weights linked below.
- If your family members are skeptical about fermented carrots, try serving them with some Homemade Kefir Ranch – a double probiotic punch.
- Want to learn more about fermenting veggies? Join the School of Traditional Skills and take my class on all things fermented veggies.
Recipe FAQs
Eating fermented foods is a super healthy way to increase your probiotic intake. Not only are you getting a serving of vegetables, but since they have been fermented, they now contain live probiotics. Probiotics help improve healthy gut bacteria. Having healthy gut bacteria has been shown to help a variety of things: from boosting your immune system to decreasing inflammation – and it may even help decrease certain diseases. (source)
2-10 days. The amount of time will depend on the temperature in the house and your preferences. You can give the veggies a little taste each day to see if the desired taste and texture is reached.
They have a traditional carrot flavor with the addition of a salty, tangy, and slightly sour kick. You can also give them a more classic pickle flavor by adding pickling spices like garlic, onion, and dill.
Most fermented vegetables will stay in the fridge for 3-5 months. If you see any mold, or it smells ‘off’, then pitch it.
More Fermented Vegetable Recipes
- Fermented Cucumbers – The Easiest Way to Make Homemade Pickles
- How to Make Homemade Sauerkraut
- Homemade Kimchi
- Lacto Fermented Salsa Recipe
- How To Make Fermented Jalapeños
If you try this recipe and love it, I would love it if you could come back and give it 5 stars! Tag me on Instagram @farmhouseonboone.
Fermented Carrots

Equipment
- 1 Glass Fermenting Weight optional
- 1 Fermentation Lid optional
- 1 1/2 Gallon Mason Jar
Ingredients
- 2 cups filtered water, Plus additional water to fill your jar.
- 4 tablespoons salt
- 1 pound whole carrots
Instructions
- Bring 2 cups of water to a light simmer. Remove it from the heat and stir in the salt, until dissolved.
- Add the salt water to a half gallon glass mason jar. Fill the jar the rest of the way with filtered water.
- Slice the carrots into long thin sticks. Put them in another half gallon mason jar, and pour the prepared brine over them until they are fully submerged. Leave one to two inches headspace.
- Add some kind of fermenting weight to keep the carrots underneath the liquid. This could be a folded up cabbage leaf or a rock in a ziplock bag. If you plan to ferment often, you could even buy weights specifically made for fermenting.
- Cover with a loose lid, or a tea towel and rubber band.
- Allow the carrots to sit in an undisturbed place for 2-10 days. The amount of time will depend on the temperature in the house and your preferences. You can give the veggies a little taste each day to see if the desired taste and texture is reached.
- Once the carrots are done fermenting, cover them with a tight lid and move the jar to the refrigerator.
Notes
-
- Slice carrots into long strips to make them easy to remove from the jar.
- Make a big batch at one time and then you can enjoy them for months. They make such a great snack or side.
- Add your favorite flavorings to spice them up. We love to add cloves of garlic, fresh dill, mustard seed, and some peppercorns to give them a classic pickle taste.
- The carrots need to be submerged in the salt water brine to prevent mold or spoilage; I love using the glass weights linked below.
- If your family members are skeptical about fermented carrots, try serving them with some Homemade Kefir Ranch – a double probiotic punch.
- Want to learn more about fermenting veggies? Join the School of Traditional Skills and take my class on all things fermented veggies.
Nutrition
Nutrition information is automatically calculated, so should only be used as an approximation.


I’ve been wanting to try fermented veggies for a while now to help with our gut health! I’ve been intimidated because we live in Hawaii, and the average temp in my kitchen is 78 degrees (even in the winter!). Would my fermentation process just be shortened because of this?
(I noticed this question has not been answered. It’s a great question!) ANY *NON-IODIZED* salt will do! Pickling salt, real salt, pink salt. Avoid common, commercial, iodized salt as it will cause your brine to look CLOUDY.
Yum! Question about the salt: is pink Himalayan salt ok? Or does this require the very specific brining salt used by butchers?
Hello Lisa! Thanks so very much for sharing all of your recipes. I’ve made so many of them, and their all delicious! I’m going to make you zucchini lasagne this weekend, and today I wanted to start making fermented green beans, and then the salsa. I havE a question about the brine solution please Niall wanted to know if there’s a basic brine recipe that I can use for any vegetables. I would like to brine green beans; cucumbers; carrots; and onions. I noticed that you have posted differenT brine recipes for different vegetables. Is there a reason for the different brine recipes, please? I love kimchee, and I will make that also. Same with the sauerkraut. I know that they make their own brine. Thank you!
Hi Lisa,
Should I peel the carrots?
Is it okay if I cut carrots in half so I can use a smaller bottle?
Thanks
Do you peel the carrots?
I usually peel them, but I don’t think it’s required – as long as you clean them well to remove any dirt, etc. I’ve read that a lot of the naturally occurring good bacteria is on the peel.
What if you use quart jars? Is the salt to water (plus additional water) ratio the same? Our carrots are short. 😊
I make up a gallon of brine @ a ratio of 8 tbsp per gallon pickling salt, Kosher salt or pink himalyan salt. I use a purchased gallon of spring water as the water source. I put the vegetables, spices and dill into the jar and then top with the pre-made Brine. I keep any extra brine in the container in the refrigerator and use it to top off the pickled vegetables as I remove them for consumption. In reality I try to be precise: I use a kitchen sale to measure out 136.7 grams of salt which is equiv to 8 tbsp of salt depending on the density of the particluar kind of salt. This means that the fine ground pickling salt weighs more per tbsp than does coarse grind Kosher salt. Both are very pure but if you want a consistent brine strength of 3.48% it is best to weigh out the salt and add that to a gallon of water.
I just love how colorful and delicious these carrots are. Fermented foods are so tasty. Thanks for making it so accessible!
I love the health benefits of fermented foods! These are so colorful and very delicious!
Once you have fermented the veggies for the desired amount of time do you leave the fermenting weight in the jar when you store the product in the fridge or do you take it out? Thank you for your help!
No, you can remove the fermenting weights, and seal bottle with it’s regular cap or lid, then put away in the fridge. Make sure jar is properly closed.
thank you for asking this question I was thinking the same thing!
These are so delicious! I am so happy I still have some leftover in my fridge!